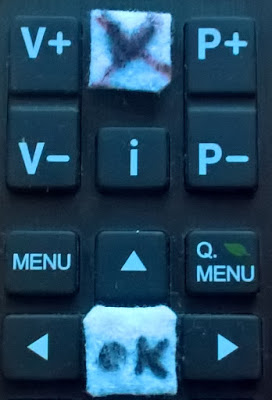
With this tip... (get your sharp knife ready) life will be much easier accessing any button with ease, and without ever needing to look at your remote again. Perfect at all times, and ideal for visually impaired people.
There are three ways to do this. You decide what's best for you.
Some remote controls have a raised 'bobble', similar to the 'J and F key' on a computer keyboard used for touch-typing, and to help locate specific buttons easily. In addition, most remote controls have raised 'bobbles' on them, unfortunately, they are not in the the most convenient of places. I can hardly feel mine so I chose to make my own.
1. Cutting Notches
Choose which buttons you use regularly.. Preferably the ones you want to use without needing to look at the remote. With very sharp knife, make two small 'V shaped angular cuts' where you'd like the markers (wedges) to be. I chose to have six wedges. Once my thumb touched any one of these, I know what buttons are located above, below and next to. (as seen in the image below).
If You're Thinking Your Going To Damage Them
When I showed someone how to use my control by using these home made
notches, they thought it was actually designed that way, so don't
worry about you thinking you're damaging them. In fact, your
making your remote control more useful - I would recommend doing it neater than I did.
When I first made the cuts, I made them small, but they soon wore down - this time I made them slightly bigger.
-------------------------------------------
2. Adding Stickers
On this control, I had to use stickers (furniture pads) cut to size. Very handy and simple to use and without the cutting and slicing. You can buy 'gem' stickers which are coloured and 3D is and another ideal solution.
-------------------------------------------
3. 'Scoring' The Side
Using a sharp knife to make 'thin cuts' (ridges) onto the side of the control. Another option and very handy.
That's all folks.
Except... Disclaimer: I am not responsible for any damage you make to your remote controls by you cutting too deep which may affect the electronics, or cutting your fingers.


No comments:
Post a Comment